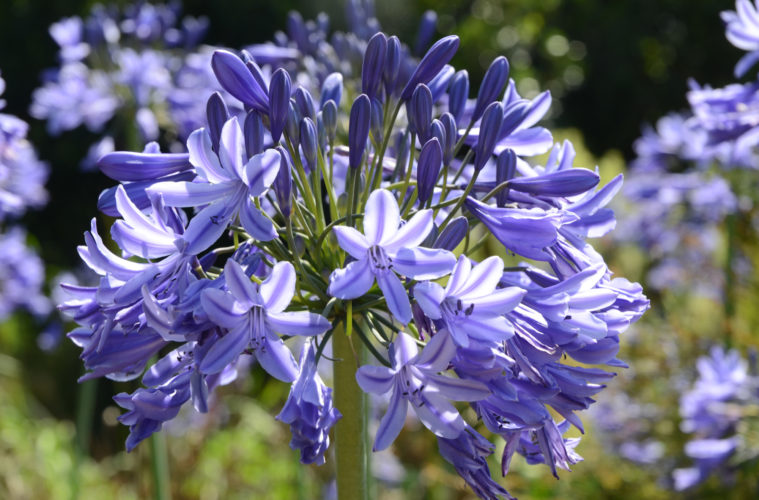
Dividing agapanthus will rejuvenate these eye-catching plants. Here’s how to divide agapanthus the right way (without damaging your plants).
READ MORE: 6 ways to make a small garden look bigger
WHY DIVIDE AGAPANTHUS
Agapanthus are versatile plants that are at their prime in summer. They can be planted en masse, as an edging to a path, as bold eye-catchers in the border or in containers. They need minimal attention and, as they like to be crowded, they can be left to their own devices for years; they’ll happily multiply into clumps of individual plants.
However when these clumps become too large, they begin to dominate the garden and start flowering less, so it’s a good idea to rejuvenate them by lifting and splitting them up. Once you learn how to divide agapanthus, as an added bonus you’ll get additional plants to plant elsewhere.
READ MORE: 5 fragrant climbers that every garden needs
WHEN TO DIVIDE AGAPANTHUS
Evergreen varieties: In South Africa, the best time to divide evergreen agapathus is in spring and early summer as new growth emerges, or in early autumn, about March/April, after the plants have finished flowering. If you divide your agapanthus in spring, they are less likely to flower in the same year.
Divide your agapanthus plants every 4–5 years or when they become too large and under productive.
Deciduous varieties: In spring and early summer divide deciduous agapanthus as new growth emerges in cooler areas or once the leaves have died back in late autumn. Only divide them every 6–8 years.
READ MORE: The ultimate step-by-step guide to pruning roses
WHAT YOU’LL NEED
- A spade (the sharper the blade the better)
- Two large garden forks
- A groundsheet to protect your lawn, if necessary
- A large, strong knife or saw for tackling tightly knitted, woody clumps
HOW TO DIVIDE AGAPANTHUS
Step 1:
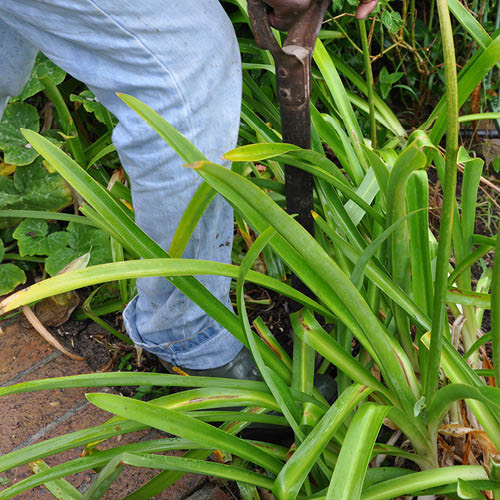
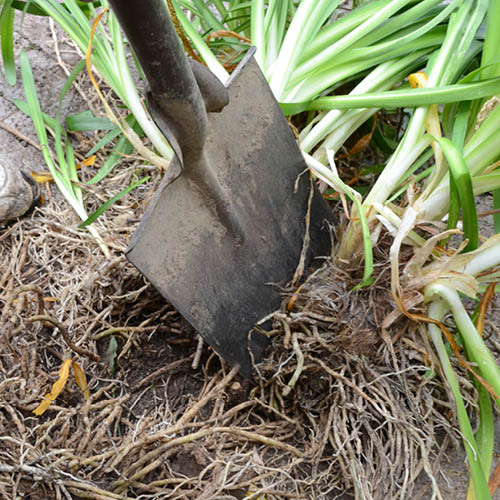
Dig around each clump with a spade or a garden fork. If the clump is large, or several clumps have become intertwined, slice though the roots on all sides of the clump holding the spade vertically.
Step 2:
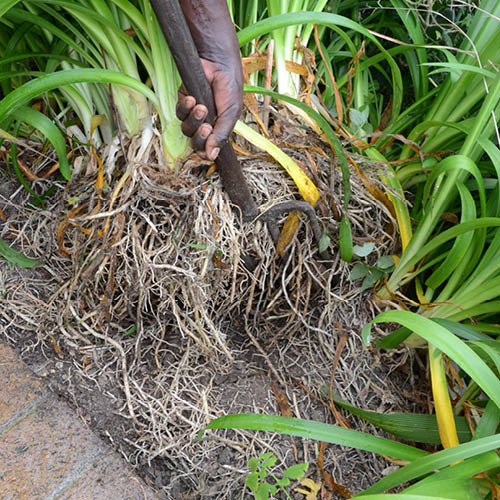
Lift the clumps with a spade or prise them out of the ground with a garden fork; as the fleshy roots are tough this can take some muscle! Shake off the excess soil.
Step 3:
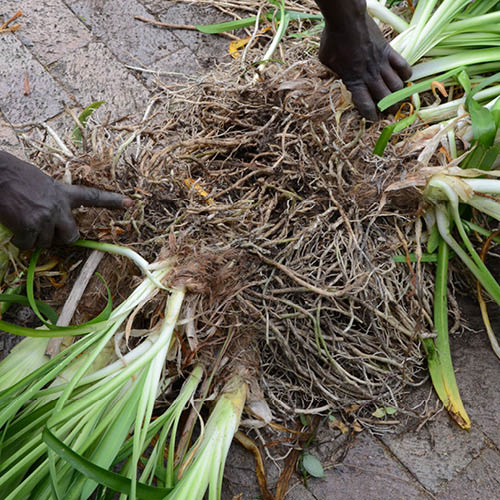
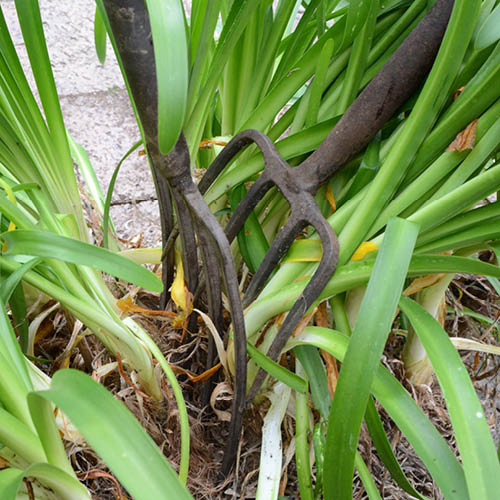
If you can, split each clump in half using your hands (a). If the roots are too intertwined, place two strong garden forks back to back and using one as a lever, force the clump apart (b).
Step 4:
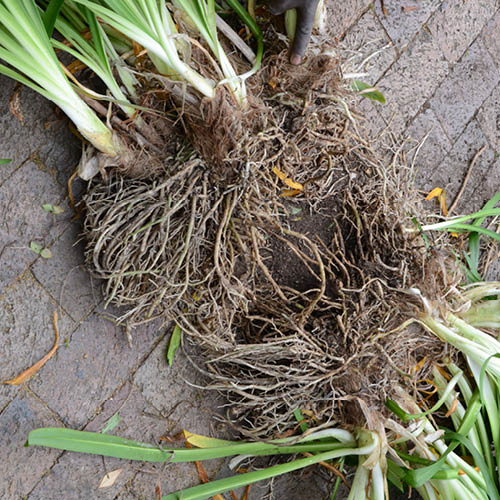
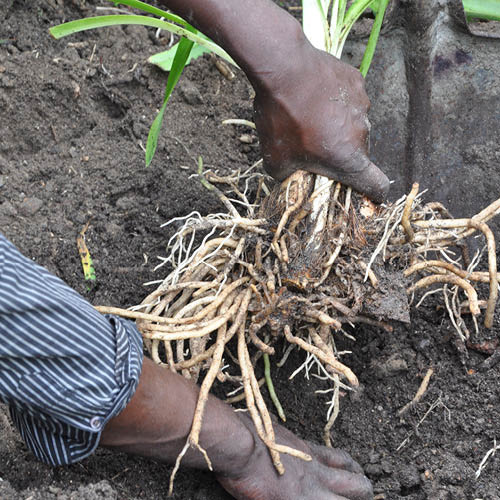
Separate each clump into smaller clumps, each with a healthy root system, or into individual plants. You can do this by hand (a), teasing out the roots with your fingers, or using a sharp knife, saw or spade (b). Discard any old woody portions and those plants with no crown (the point from which the roots and leaves develop), retaining the best sections for replanting.
NOTE: Clumps can be split in half, broken into thirds or quarters or divided into individual plants. Bear in mind that the smaller the divisions, the longer it’ll take for the plants to bloom after replanting.
Step 5:
Trim the leaves back by about a half to two thirds.

Step 6:
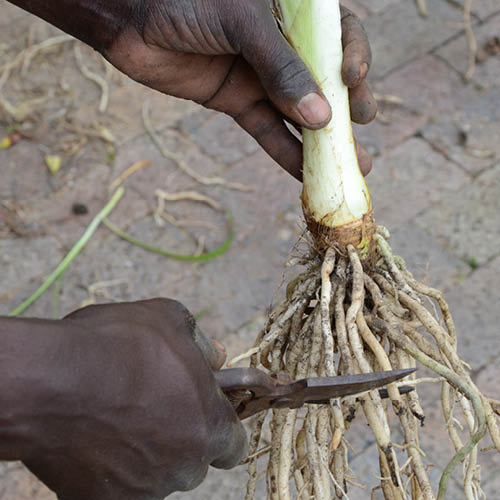
Trim off any damaged and loose roots and remove any dead leaves. Place your divided plants in a cool spot and cover with damp newspaper until you’re ready to plant them.
Step 7:
Before replanting, enrich the soil with plenty of compost. Space larger clumps 30–50cm apart and individual plants about 10–15cm apart, depending on the variety. Spread the roots out and plant them at the same soil depth as they were previously.
Step 8:
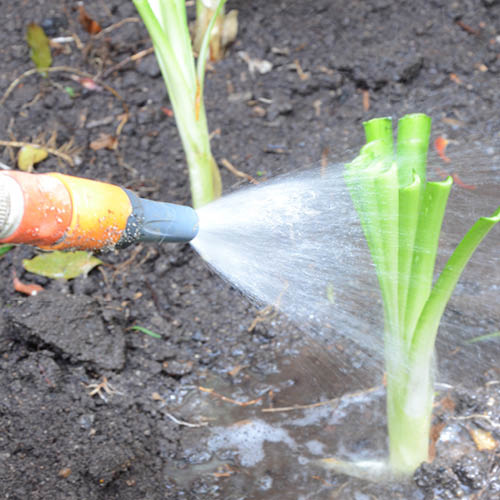
Firm down the soil and water well. Keep the plants moist for a few weeks until they’re established.
READ MORE: 6 indestructible indoor plants

