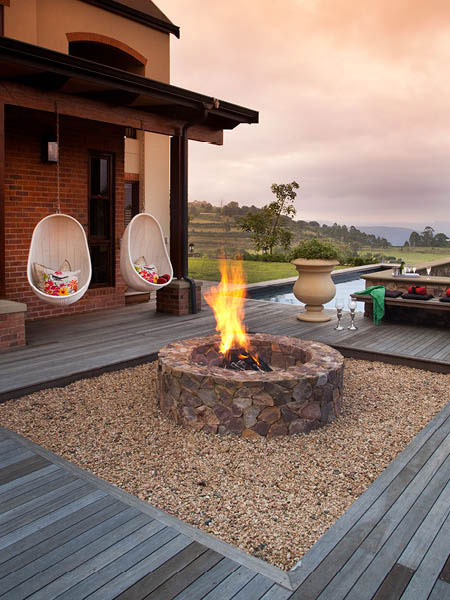
Firepits are attractive, functional and provide an outdoor area that’s perfect for socialising. Build a firepit you can be proud of with instructions from Lafarge
Ideally, a firepit should be constructed from fireproof material on a flat, level area at least three metres from a house or any trees. They are strictly governed by local building codes and in some areas the pit is required to be surrounded by a border of sand or gravel. So, before you decide to add one to your garden, find out what exactly the regulations are.
Firepits can be built in different shapes and sizes. Here, Lafarge has provided instructions for a circular firepit of about 60cm high and 1,5m wide with a 90cm interior diameter.
What you’ll need:
Tools
- Tape measure
- Stake
- Trowel
- Jointer
- Hammer
Materials
- String and rebar
- Sand and stone
- Spray paint
- Lafarge Buildcrete
- High heat stove paint
How to build a firepit:

Building the foundation
- Pound a rebar stake into the ground at the centre of the firepit, then mark the circumference of the circle. For a firepit with a diameter of 1,5m, attach string to the stake, measure half the length of your circumference and tie the end of the string to a can of spray paint. Pull the string lightly taut and walk around the stake as you spray-paint the line of the circumference.
- Dig the space out to a depth of 15cm. Then use the same method as above to mark an inner circle 30cm in from the outside circle. This inner circle will be the edge of the firepit wall.
- Make a foundation for the stone wall of the pit to sit on. Mix concrete with water until it reaches the desired consistency – or choose the easy way and use an EkhayaBag of ready-mixed concrete. Lay a thin amount of wet concrete between the two circles. Leave the centre area free of concrete to allow for drainage. Build up the concrete until it is about 2,5cm below ground level. Press rebar into the concrete for reinforcement. Smooth the surface with a trowel and allow to dry for 24 hours.
Building the outer wall
- Once the foundation is set, it’s time to lay the stones. Mix mortar and then shovel about 6cm of it on top of the concrete base. Working in small sections, lay the stones on the mortar.
- If you are using natural stone, mix the sizes and colours of the stones, and choose stone faces that are attractive and match the slight curve of your outline. Where necessary, use a chipping hammer to shape individual stones.
- As the first few levels of stones begin to take shape along the outside edge of the firepit, begin to lay fire/clay bricks, commonly known as ‘facebrick’ to form the inner wall of the structure.
Building the inner fire brick wall
- Level each brick, then fill the gaps in between with wet mortar, scraping away any excess. Make sure to measure the inside and outside edges of the wall periodically to maintain a constant thickness and the circular shape.
- Continue to raise both the bricks (against the inside circle) and the stones (against the outside circle), filling in any gaps in between with stones and mortar as the wall grows. Staggering the seams of the stones and bricks makes the structure more stable and gives it a better look. Use a jointer to remove excess mortar from between the stones.
- To finish the structure, lay a cap of pre-selected flat fieldstones on top of the wall.
- Add about a 2,5cm layer of mortar and then begin laying the stones, making sure the tops create a flat, even surface along the entire circumference. Add more mortar between these capstones to complete the firepit.
Finishing the firepit
With the basic structure complete, you can now focus on a few finishing touches:
- Using a standard paintbrush, brush the exterior of the stones to remove loose debris.
- Then, lightly spray with a garden hose to remove any leftover mortar.
- To give the firebricks on the inside of the structure a uniform finish, spray-paint the bricks with high-heat stove paint in black.
- Fill the pit with a base layer of river rocks or 19mm crushed stone.
ALSO SEE: HOW TO CHOOSE A FIRE PIT THAT IS GOOD VALUE FOR MONEY


